

Create and Manage Device Tagging in MDE (Part1)
- Anand P
- Nov 2, 2021
- 3 min read

Updated: Jul 8, 2022
Why do we need Device Tagging?
Device tagging is one of the features in MDE which often isn't utilized correctly, with device tagging we can apply the granular level of control over how to manage devices in MDE, in this blog I will be covering the primary use of tagging, but also different options to tag devices in MDE efficiently.
The primary use of device tagging is to allow you to create machine groups to apply for RBAC roles efficiently, this will help a large organization manage access control through the use of roles and machine groups.
In my personal experience, sometimes device tagging is badly required to manage the decommissioned machines, when a machine is decommissioned the health state will change to inactive post 7 days, at the same time other machines can be also in an inactive state due to sensor issues, to identify the actual state of inactive the tag will help in such cases
Another example I can point out is while creating a device group it is easier to tag so that we can categorize the devices within the right department this will help during threat hunting as well to identify the device easily
In this blog, I will explain different methods of tagging devices in MDE
Manual Tagging
Manual tagging is one of the easiest methods to tag devices in MDE but this is not efficient if you have 100+ devices, but this is well helpful when the tag is limited to specific machines for example 10 machines, but I think most of them don't like to repeat manual work, I will be explaining other ways as well to tag devices.
Step 1: Navigate to MDE Portal Link and select the device you need to tag once the device page is opened, you can see Manage Tag option

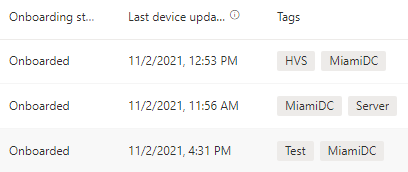
Step 2: Enter the Tag you need to add to the device in my case I had provided HVS as a tag to identify this machine as a high-value server and tap on entering to add the tag and the device will have the respective tag


Tagging Devices Using API
For better performance, you can use a server closer to your geo location:

api-us.securitycenter.microsoft.com
api-eu.securitycenter.microsoft.com
api-uk.securitycenter.microsoft.com
Limitations
You can post on machines last seen according to your configured retention period.
Rate limitations for this API are 100 calls per minute and 1500 calls per hour.Step 1: Navigate to API explorer in the Security Center Link

Step 2: Before that, you need to identify the machine id for that either you can use API or advance hunt query (KQL)
To fetch machine-id using Advance Hunt Query you can use the first advance hunt query for a specific machine and you can use the second one if you need to get machines containing the specific common value
DeviceInfo
| where DeviceName == "win-hvu34p23mh5"
| summarize by DeviceId,DeviceName
DeviceInfo
| where DeviceName contains "win"
| summarize  by DeviceId,DeviceName
Using API to fetch device id you can run the below query in API explorer this will fetch all the machines with their ID and Machine name.
Get https://api-us.securitycenter.windows.com/api/machines?$Select=Id,computerDnsName
Step 3: Once you have the machine ID you can use API explorer to add the device tag using the below API query, here I request an action to add a tag respective to the value "Server"
Note: replace the machine id with your machine id and the value as well
https://api-us.securitycenter.windows.com/api/machines/064060f5b5f25653e958e2cf23649f555fd78d02/tags

{
    "Value"  : "Server",
    "Action" : "Add"
}

You can see the tag names Server is added to the machine
Step 4: To remove the device tag, use the below API query, here I request to remove the tag
https://api-us.securitycenter.windows.com/api/machines/064060f5b5f25653e958e2cf23649f555fd78d02/tags

{
    "Value"  : "Server",
    "Action" : "Remove"
}

You can see in the return value the tag Server is removed from the machine


Comments